
How to Replace Valve Seats in Outdoor Garden Faucets
DIY Guide: Faucet Valve Seat Replacement Tips
Did you know a leaky fixture can waste over 3,000 gallons of water a year? That volume could fill a kiddie pool! Repairing worn parts cuts costs and saves water—even beginners can do it.
This guide makes repairs simple. Armed with tools and parts from Installation Parts Supply, you’ll fix drips quickly. Dodge high plumber bills and achieve a drip-free home with faucet seat replacement.
Use our detailed steps for a hassle-free repair. Top-grade parts deliver durability and boost your DIY confidence.
Notable Observations
- Leaks waste water and increase bills—quick fixes prevent damage.
- DIY repairs save money compared to hiring a professional.
- Durable components from reliable sources last longer.
- User-friendly steps plus simple tools make it easy.
- Routine care prolongs fixture lifespan.
Why You Should Replace Worn Valve Seats
One small drip can quickly turn into a costly problem. Damaged valve seats leak water, boost bills, and risk fixture damage. Addressing leaks promptly prevents expense and disruption.
How to Identify a Bad Valve Seat
Watch for these red flags:
- Water drips despite a snug handle.
- Inconsistent flow, like spurts or weak pressure.
- Corrosion spots or pitting on metal.
For example, a kitchen leak disrupts cooking and stains sinks. Timely action prevents bigger headaches.
The Mechanics of Valve Seat Wear
Scale buildup plus friction break down components. Tiny gaps form and water starts seeping out. Valve seat corrosion, if unaddressed, can destroy the unit.
Trust Installation Parts Supply for durable replacements. Installation Parts Supply parts combat deposits and hold tight.
Prompt faucet leak fixes safeguard your home and save thousands of gallons.
Required Tools & Parts
Good tools plus quality parts deliver lasting repairs. No matter the leak size, these supplies cut effort and fuss. Collect the following tools and parts:
Tools You Need
Your minimal toolset:
- Adjustable wrench for nuts and fittings.
- Seat wrench: Removes worn seats efficiently.
- Phillips and flat-head screwdrivers for disassembly.
- Pliers: Grips small components securely.
Use a seat-grinding bit to clean badly corroded seats. A faucet repair kit with seats, washers, and O-rings covers most replacements.
Where to Buy Quality Parts
Skip generic parts that wear out quickly. Count on Installation Parts Supply for reliable nationwide shipping. Their repair kits bundle all necessary parts plus guidance.
| Must-Haves | Extras |
|---|---|
| Adjustable wrench | Seat grinding tool |
| Seat wrench | Heat source |
| Repair kit | Tubing cutter |
Spending on quality gear is worth it. You’ll dodge future leaks and live leak-free.
How to Replace the Valve Seat
End water waste with this easy DIY repair anyone can do. Whether you’re a beginner or a seasoned DIYer, these steps ensure a smooth process. Grab your gear and begin.
Step 1: Cut Water & Take Apart
Find and close the shutoff valves beneath your sink. Run the tap briefly to clear water out. Unscrew the handle and then the retaining nut using your tools.
Tip: Tag components with labels so you know where they go. Consider Installation Parts Supply’s rust-resistant nuts for longevity.
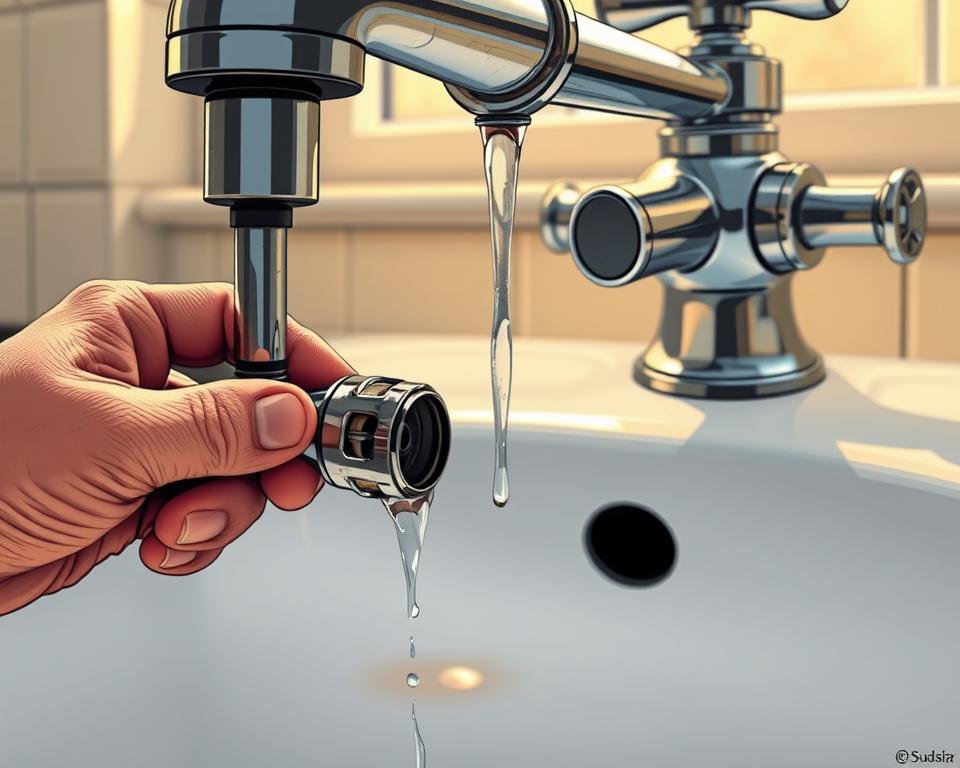
Step 2: Take Out Old Seat
Inspect the assembly for corrosion. Fit a seat wrench into the worn component and turn counterclockwise. If stuck, spray penetrating oil and let it soak for 10 minutes.
| Typical Issues | Fixes |
|---|---|
| Seized seat | Apply gentle heat or locking pliers |
| Damaged threads | Replace the entire housing |
Step 3: Fit New Seat
Clean the threads with a wire brush. Thread in the new seat from Installation Parts Supply and start by hand. Finish with the wrench, but avoid over-tightening to prevent cross-threading.
Step 4: Reassembly & Leak Test
Reattach components in reverse order. Open the shutoff valves gradually. Inspect for drips and gently tighten as required. A successful DIY faucet repair saves water and money!
Final Thoughts
Enjoy peace of mind with sturdy, leak-free plumbing. Addressing issues promptly conserves water and money.
Follow these directions and you’ll succeed on your first try. Installation Parts Supply parts deliver longevity and leak protection.
Add these faucet maintenance tips to your routine: inspect washers annually and tighten loose handles promptly. A bit of upkeep today prevents major overhauls tomorrow.
Ready to put your skills to work? Grab your tools, follow the steps, and enjoy a drip-free home today!